NovelWriter Tutorial & Review
Last updated: 1 month, 2 weeks ago
Intro
First off, I would like to say that I will not be posting a Fan Fiction Friday this week. I have been working hard on my novel and completely lost track of the day. Instead, I am doing this review on NovelWriter.
Reasoning for NovelWriter
Previously, I had been working with LibreOffice (Open-source version of Microsoft Office) to do my writing in. But I was struggling with organizing the work in a way that works with my brain. I found that if I kept everything in one file, then I had this monolithic file that I spent so much time scrolling up and down looking for the info that I needed.
Then I split everything into their own files; all characters in one, all places in another, main story, main plot, and so on. The problem with this, that you may already see, is that now I have a bunch of files open and they are monolithic scroll fests!
How Did I Come to NovelWriter
I reached out to the Writerly Wyverns (Discord group for writers) to see what everyone else was using. The overwhelming vote was to use Scrivener. I went hunting for that. Found out that it is pay only and not natively available on Linux. Yes, I know I could run it under Wine and other Linuxy voodoo, but I was not interested in messing with that, I just wanted to get back to writing.
Next step, Google! I found that NovelWriter was a Linux first, open-source alternative to Scrivener. The developer also has an installation package for Windows and a discontinued package for macOS.
Basic Tutorial
Installation and Creating a New Project
I am currently running Fedora, so the installation was as simple as:
sudo dnf install novelwriter
Once installed, open the software and create a new project.
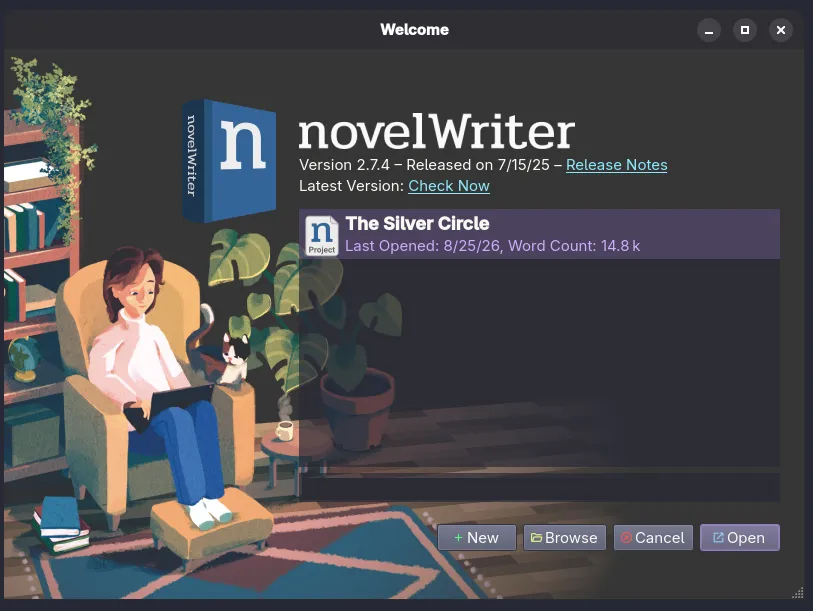
Figure 1: Screen shot of opening the app
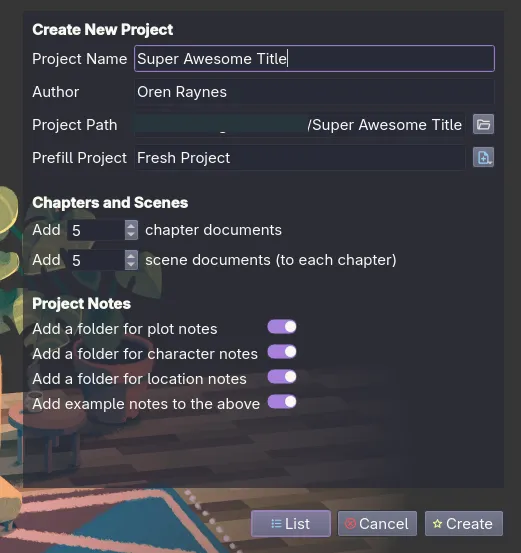
Figure 2: Screen shot of creating a new project
In this 'Create New Project' screen, you'll need a title for the project, your author name, and a save location. The rest is all optional:
- I have not used Prefill Project yet, but that sounds like you can use project templates or other projects to create the new project with.
- Chapters and Scenes allow you to have the program pre-create any number of chapters with any number of scenes beneath each chapter
- The three "add folder notes" toggles are super useful for organization and the create folders are what makes all of this click for me
- The example notes are super useful for me as a new writer. It gives you starter tags for each notes folder.
Click the Create button and you'll be greeted with your new novel workspace!
Your New Workspace
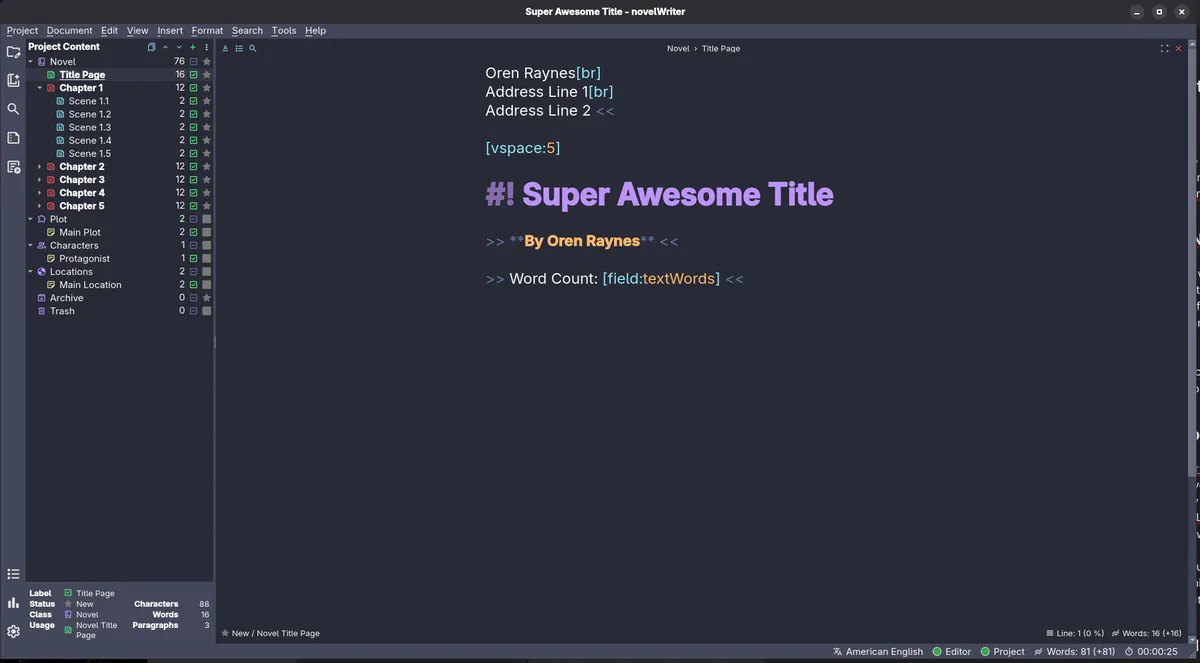
Figure 3: Brand new NovelWriter workspace. Your new workspace will look a little different in style; I have already been adjusting the look of it. But I haven't changed any behavior or structure yet.
On the left panel, "Project Content", is the file structure of the project showing all your working files for chapters, scenes, locations, characters, plot, etc. Below that is a small legend and word count. The right pane is your write pane.... hehehe. The area where you do all your writing.
Start writing!
I will probably post more tutorial centric posts about novelWriter in the future, but for now this post is supposed to be a review. Until I do make more tutorials, here is a link to Documentation and the documentation is fairly well done.
Review
The Good
So far NovelWriter has really clicked with me on writing. Its use of fragmenting files, having those files readily available at all times, and remembering my location in those files has really been jiving with me. Writing feels less like a chore now and I have been doing so much more writing.
The tag system seems good. I am still learning that right now. The documentation is fairly well done. I love having the word count from all the files separately and cumulatively. I just noticed while writing this that the word count timer sitting at the bottom right of the screen only counts while the app has active focus.
There is a lot of good here that I am still finding.
The Bad
NovelWriter uses its own form of Markdown files on the backend and its own file titling. This was the biggest hangup for me. I would have preferred that it use traditional Markdown with user-defined titles instead. The reason being that I like to also work in the terminal or on Android. Which is a related issue, there is currently no Android app. So I tried to use Obsidian and Markor to edit on my phone but Obsidian refuses to open anything but MD, whereas Markor will open the files but all the files have random titles making it hard to find the correct file I want to work on.
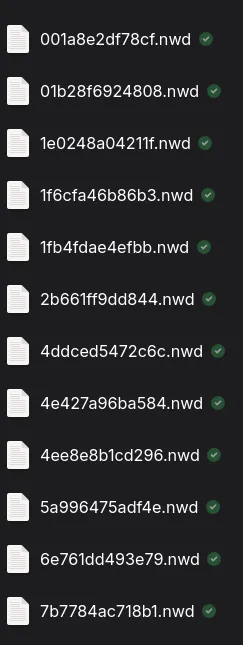
Figure 4: Example of file names made by NovelWriter
Another thing I don't like, and may just be my ignorance or my weird ways, is that it seems incredibly difficult to set-up multiple stories in one project file. I wrote a flash fiction based on this book that I am working on and I am also working on a short story for it. Basically, I want several supporting smaller fictions based in the same world with the same cast. And it seems to me that the "correct" way of doing that is to have each go to their own NovelWriter project. But I want them all in the same project because they all use the same notes. It's something I am still working on figuring out.
UPDATE Aug 31 2026
Since writing this post, I have indeed found that it was just me being a numpty. One can add additional Novel root nodes which allow you to have multiple stories in one project.
The Verdict
I have never used Scrivener, so I can't say how NovelWriter compares to that, but so far NovelWriter has been fantastic to work with and it works really well with how I work. The organized fragmentation of files is perfect for me. I would recommend everyone try out this product (or Scrivener which is apparently better).
Join me at: